E08 adalah error yang disebabkan limit print dari head sudah mencapai 2000 lembar, yang biasanya printer minta di reset…
berikut ada langkah2 nya
Cara 1 :
1. Printer dalam keadaan mati dan kabel listrik terpasang.
2. Tekan Tombol STOP/RESET dan tahan, kemudian tekan tombol POWER dan tahan.
3. Tombol POWER masih ditekan, lepas tombol STOP/RESET, kemudian tekan tombol STOP/RESET 2 x dalam keadaan tombol power masih ditekan.
4. Lepas kedua tombol secara bersamaan.
5. Printer akan berproses beberapa saat (agak lama), kemudian LCD Panel akan menunjukkan angka NOL (0)
6. Komputer akan mendeteksi DEVICE BARU, Abaikan saja …..
7. Keadaan ini menunjukkan printer MP258 dalam keadaan SERVICE MODE dan siap direset.
Kemudian download software nya disini DI SINI
1. Exctract File Resetter MP258.
2. Siapkan 2 kertas di printer (ini untuk print pada waktu proses reset)
3. Jalankan program Resetter MP258.
Klik “MAIN”, maka printer akan berproses, kemudian MP258 akan print satu halaman dengan tulisan ” D=000.0 “
Klik ” EEPROM Clear “.
Kemudian klik ” EEPROM “, dan printer akan print hasil Resetter MP258. Salah satu barisnya adalah sebagai berikut : “TPAGE(TTL=00000 COPY=00000)”
Matikan Printer dengan menekan tombol POWER.
Selesai…….
Free Hiren's Boot CD/DVD v15.2
Hiren's Boot CD rescue disk name composed of the best and most useful tools in a compact, maintenance, troubleshooting and commissioning of the system as a Bootable CD is required by most computer users. This boot disk, different software, such as file manager, anti-virus, troubleshooting tools, system tools, disk partitioning, security software and data recovery, hard drive repair tools and ...
There was a problem when your operating system This CD will come to your aid. One of the applications in this category is WebBrowserPassView any username and password which can be found in various browsers, Mozilla Firefox, Opera, Google Chrome and Internet explorer view. The security certificate is also a large collection of software applications.
This CD collection is published by Hiren & Pankaj. Hiren's Boot CD 15/02 in some applications: - The Security Tools: Software by Gmer, Dr.web, ComboFix, Avira, Spybot, ... - sector Tools Backup: Clonedisk software, Diskimage, Gimagex, Regbak, ... - The Tools BIOS / CMOS: Applications! Bios, CMOS, CMOS Kill, Uniflash, ... - the cleanup tool: ATF Cleaner, Cleanup, Clonespy, Delete Doctor, ... - The Hard Disk Tools: Actvie Kill Disk, DiskView, DiskWipe, HDTune, HDAT2, ... and .... more...
- Internet slow ?
- Sibuk ?
- Tak tahu kat mana nak download ?
- Tak tahu kat mana nak cari ?
- Kami ada penyelesaiannya....
- Bank-in RM30.00 Bank in ke akaun CIMB : Noor Fathilah Jaafar
No akaun : 03110008580528 . - Selepas membuat pembayaran, sila SMS ke 013 - 865 5684.
- Bayaran ini adalah untuk caj penghantaran, burn CD/DVD sahaja. Bukan caj harga software tersebut.
- Bukan satu anda dpat tapi 2. CD dan DVD tuh....
- Penghantaran akan dibuat dalam masa 5 hari bekerja.
How to Setup VPN Access
Configure PPTP VPN in Windows 7
- From Windows 7 Desktop, click Start – Control Panel to open the control panel;
- Click Network and Internet;
- Click Network and Sharing Center;
- Click Set up a new connection or network, then Connect to a workplace;
- Select option No, create a new cnonection, then Use my Internet connection (VPN);
- In the Connect to a workplace window, fill VPN Server hostname with IP found from website;
- In Next window, use freevpnaccess.com as User name field, and use password found from website in the Password field;
- Click “Connect” button to start the free VPN connection in your Windows 7 Desktop.
Configure Free PPTP VPN in Windows 8
- Please check www.Windows8VPN.com for more instructions.
Configure Free PPTP VPN in Apple iOS Devices
- From iPhone, iPod touch or iPad, Press iPhone, iPod touch or iPad’s Home button;
- Touch “Settings” icon, select VPN – Add VPN Configuration …
- Select ‘PPTP’, adding fields as:
Server:
Account: freevpnaccess.com
RSA SecurID: OFF
Password: check vpn website
Encryption level: Auto
Send All traffic: ON
- Touch ‘save’ button to save the VPN configuration;
- Slide the VPN status button from OFF to ON position, wait until VPN connected.
Configure Free PPTP VPN in Google Android Devices
- From Andord smartphones, tablets, or set tp boxes, switch back to Home screen;
- Touch “Settings” icon, touch More… – VPN text bar;
- Touch “+” button to add a new VPN profile, and fill the VPN fields as below:
- Set “Name” as “FreeVPNAccess.COM”;
- Set “Type” as PPTP;
- Set “Server address” as the IP found from website;
- Checked “PPP encryption (MPPE)” option;
- Touch “Save” button to save the VPN connection;
- Touch “FreeVPNAccess.COM” text bar to connect the VPN, Android will prompt the username/password information;
- Enter “freevpnaccess.com” as the VPN username, and enter the password found from our website as the VPN password;
- Touch “Connect” button to start the VPN connection, wait until VPN is connected.
Configure Free PPTP VPN in Windows XP
- From Windows XP desktop, click Start – Control Panel to open the control panel;
- Click Network Connections icon, open the Network Connections window;
- Click Next button to get the first “New Connection Wizard” Welcome window;
- Select “Connect to the network at my workspace” in “Network Connection Type” window, click Next;
- Select “Virtual Private Network connection” in “Network Connection” window, click Next;
- Enter FreeVPNAccess.COM as the VPN connection name, click Next;
- Enter VPN Server hostname with IP found from website, click Next;
- Click “Finish” button.
- Now the VPN login window shows up,use freevpnaccess.com as the User name and password found from website as Password, click “Connect” button to start your free Win XP VPN connection.
Kode Error Printer Canon MP 237 Serta Cara Mengatasi dan Memperbaiki Canon MP 237
Code Error Printer Canon MP 237, Canon
MP 237 jika mengalami kesalahan maka akan diberitahu dengan lampu alarm
LED bekedip/blinking orange dan menampilkan kode error printer di LCD
monitor Komputer sehingga Printer Canon MP 237 tidak dapat mencetak
data.
Kode Error Canon MP 237
biasa muncul dengan angka seperti 1300, 5011, 5100 dan menyebabkan
printer Canon MP 237 tidak dapat mencetak data. Kode Error Canon MP 237
biasanya disebabkan karena Paper Jammed, Printer is out of paper, The
FINE cartridge cannot be recognized dan masih banyak lagi.
Berikut ini Kode Error Canon MP 237 dan Cara Mengatasi Kesalahan dengan Kode Error Canon MP 237 :
- Error 1000 Canon MP 237 : Printer is out of paper / paper does not feed, Ditandai dengan blinking 2x pada Canon MP 237 dan untuk mengatasinya masukkan kertas ke bagian rear tray kemudian tekan tombol Hitam/warna pada Printer
- Error 1300 Canon MP 237 : Paper Jammed, ditandai dengan blinking 3x pada Canon MP 237 dan cara mengatasinya ambil kertas yang menyangkut pada printer.
- Error 1687 Canon MP 237 : The FINE Cartridge is not installed properly, ditandai blinking 4x pada Printer canon MP 237 dan cara mengatasinya, pastikan pemasangan cartridge sudah benar dan mengunci cartridge.
- Error 1401, 1403, 1485 Canon MP 237 : The FINE Cartridge is not installed properly, disertai blinking 5x dan cara mengatasinya adalah pasang cartridge dengan benar jika masih terjadi ganti cartridge dengan yang baru.
- Error 1486, 1487 Canon MP 237 : FINE Cartridge is not installed in the correct position, disertai dengan blinking 7x dan cara mengatasinya adalah pastikan pemasangan cartridge sudah benar jika masih terjadi coba ganti dengan cartridge baru.
- Error 1700 Canon MP 237 : Ink absorber is almost full, disertai blinking 8x dan cara mengatasinya adalah lakukanlah head cleaning pada printer Canon MP 237.
- Error 1686 Canon MP 237 : The remaining ink level cannot be detected, disertai blinking 13x karena printer tidak bisa mendeteksi level tinta, tekan tombol stop/reset selama 5 detik untuk mengabaikan error.
- Error 1684 Canon MP 237 : The FINE cartridge cannot be recognized, disertai blinking 14x karena cartridge tidak terpasang dengan benar atau cartridge tidak kompatibel dengan printer, ganti cartridge denga yang baru.
- Error 1682 Canon MP 237 : The FINE cartridge cannot be recognized, disertai blinking 15x dan cara mengatasinya adalah ganti dengan cartridge baru karena catridge lama sudah rusak.
- Error 1688 Canon MP 237 : The ink has run out, disertai dengan blinking 16x dan cara mengatasinya tekan tombol stop/reset selama 5 detik.
- Error 5100 Canon MP 237 : Paper Jammed disertai blinking 2x dan cara mengatasinya bersihkan kertas menyangkut pada printer.
- Error B200 Canon MP 237 : Blinking 10x, Matikan Printer kemudian cabut kabel power yang menyambung ke listrik selama beberapa menit kemudian pasang dan nyalakan kembali.
Beberapa Kode error pada printer canon MP 237 antara lain 5011,
5012, 5200, 5400, 5700, 6000, 6800, 6801, 5B00, 6930, 6931, 6932, 6933,
6936, 6937, 6938, 6940, 6941, 6942, 6943, 6944, 6945, 6946 dan cara
mengatasinya adalah dengan mencabut kabel power printer yang menyambung
ke listrik selama beberapa menit kemudian nyalakan kembali, Jika
masalah masih belum teratasi silahkan membawa printer tersebut ke
Service Center Canon.
sumber : http://tulisanbernaadt.blogspot.com/2013/04/kode-error-printer-canon-mp-237-serta.html
354/11/13 - Reformat Acer 4750z using Acer eRecovering Management
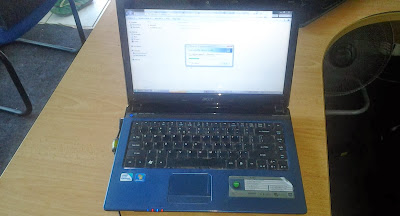
When a program does not work properly or you want to revert to the
original driver version, you can use Acer eRecovery Management to
reinstall the software and hardware device drivers pre-installed on your
Acer computer.
SOLUTION
Use the following steps to restore drivers and application from eRecovery:
- Click Start, and then All programs.
- Click Acer and then Acer eRecovery Management. You could be prompted for a password. This password will be necessary for future access to eRecovery, so it is recommended not to lose it.
- In the following window click Restore.
- Click Reinstall driver or application.
- Select Content and choose the driver or application you want to reinstall.
- On the right, click the installation link and follow the onscreen instructions.
- Your computer should restart once installation is complete. If it does not, please restart the system manually.
MORE INFORMATION
In case you wish to re-install Windows, please visit our knowledge base article Restoring the operating system.
How to Remove Malware From Your Windows PC
Step 1: Enter Safe Mode
Keep your PC disconnected from the Internet, and don't use it until you're ready to clean your PC. This can help prevent the malware from spreading and/or leaking your private data.
If you think your PC may have a malware infection, boot your PC into Microsoft's Safe Mode.
In this mode, only the minimum required programs and services are
loaded. If any malware is set to load automatically when Windows starts,
entering in this mode may prevent it from doing so.
To boot into Windows Safe Mode, first shut down your PC. Locate the
F8 key on your PC's keyboard; turn the PC on; and as soon as you see
anything on the screen, press the F8 key repeatedly. This should bring up the Advanced Boot Options menu; there, select Safe Mode with Networking and press Enter.
You may find that your PC runs noticeably faster in Safe Mode. This could be a sign that your system has a malware infection, or it could mean that you have a lot of legitimate programs that normally start up alongside Windows.
Step 2: Delete Temporary Files
Now that you're in Safe Mode, you'll want to run a virus scan. But before you do that, delete your temporary files. Doing this may speed up the virus scanning, free up disk space, and even get rid of some malware. To use the Disk Cleanup utility included with Windows, select Start, All Programs (or just Programs), Accessories, System Tools, Disk Cleanup.Step 3: Download Malware Scanners
Now you're ready to have a malware scanner do it's work--and
fortunately, running a scanner is enough to remove most infections. If
you already had an antivirus program active on your computer, you should
use a different scanner for this malware check, since your current
antivirus software may have not detected the malware. Remember, no
antivirus program can detect 100 percent of the millions of malware
types and variants.
There are two types of antivirus programs. You're probably more
familiar with real-time antivirus programs, which constantly watch for
malware. Another option is on-demand scanners, which search for malware
infections when you open the program manually and run a scan. You should
have only one real-time antivirus program installed at a time, but you
can keep a few on-demand scanners handy to run scans with multiple
programs, thereby ensuring that you're covered.
If you think your PC is infected, I recommend using an on-demand
scanner first and then following up with a full scan by your real-time
antivirus program. Among the free (and high-quality) on-demand scanners
available are BitDefender Free Edition, Kaspersky Virus Removal Tool, Malwarebytes, Norman Malware Cleaner, and SuperAntiSpyware.
Step 4: Run a Scan With Malwarebytes
For illustrative purposes, I'll describe how to use the Malwarebytes on-demand scanner. To get started, download it.
If you disconnected from the Internet for safety reasons when you first
suspected that you might be infected, reconnect to it so you can
download, install, and update Malwarebytes; then disconnect from the
Internet again before you start the actual scanning. If you can't access
the Internet or you can't download Malwarebytes on the infected
computer, download it on another computer, save it to a USB flash drive,
and take the flash drive to the infected computer.
After downloading Malwarebytes, run the setup file and follow the
wizard to install the program. Once installed, Malwarebytes will check
for updates and launch the app itself. If you get a message about the
database being outdated, select Yes to download the updates and then click OK when prompted that they have been successfully installed.
Once the program opens, keep the default scan option ('Perform quick scan') selected and click the Scan button.
By Eric Geier, PCWorld
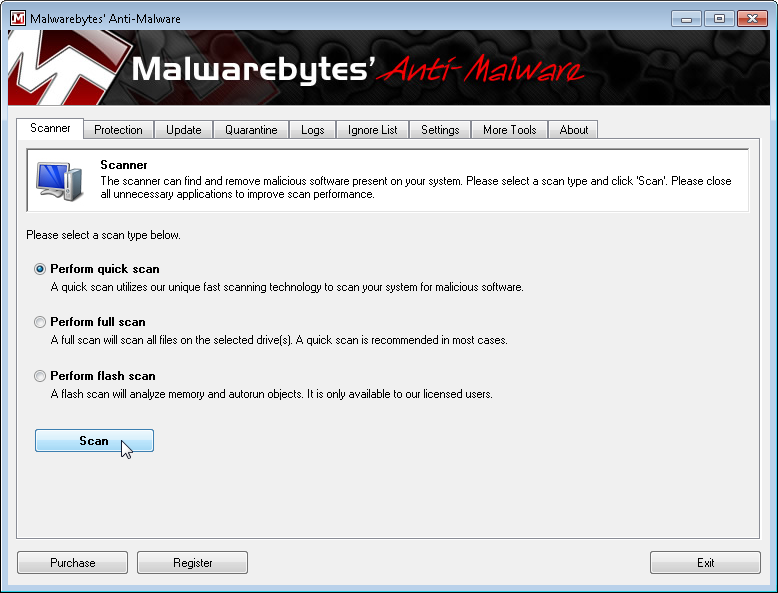
Though it offers a full-scan option, Malwarebytes recommends that you
perform the quick scan first, as that scan usually finds all of the
infections anyway. Depending on your computer, the quick scan can take
anywhere from 5 to 20 minutes, whereas the full scan might take 30 to 60
minutes or more. While Malwarebytes is scanning, you can see how many
files or objects the software has already scanned, and how many of those
files it has identified either as being malware or as being infected by
malware.
If Malwarebytes automatically disappears after it begins scanning and
won't reopen, you probably have a rootkit or other deep infection that
automatically kills scanners to prevent them from removing it. Though
you can try some tricks to get around this malicious technique, you
might be better off reinstalling Windows after backing up your files (as discussed later), in view of the time and effort you may have to expend to beat the malware.
If Malwarebytes' quick scan doesn't find any infections, it will show
you a text file containing the scan results. If you still think that
your system may have acquired some malware, consider running a full scan
with Malwarebytes and trying the other scanners mentioned earlier. If
Malwarebytes does find infections, it'll bring up a dialog box warning
you of the discovery. To see what suspect files the scanner detected,
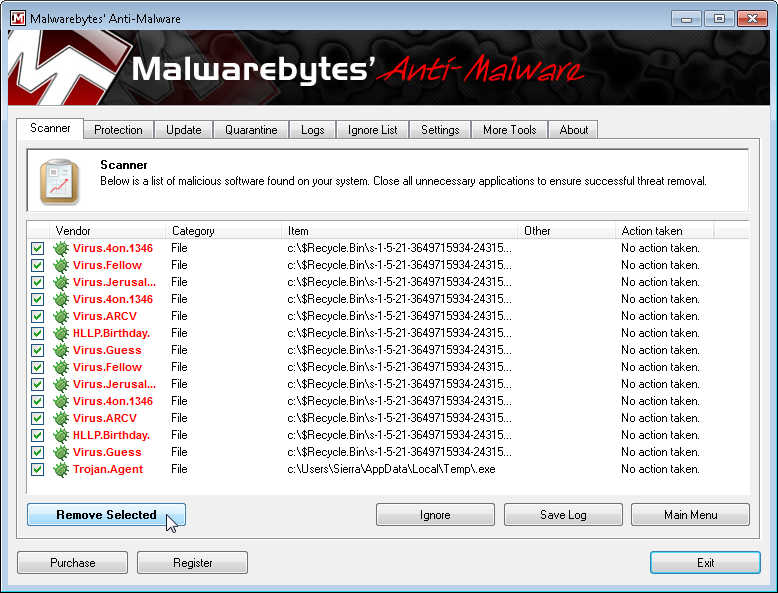
click the Scan Results button in the lower right. It
automatically selects to remove the ones that are known to be dangerous.
If you want to remove other detected items, select them as well. Then
click the Remove Selected button in the lower left to get rid of the specified infections.
Removing infections in Malwarebytes.
After removing the infections, Malwarebytes will open a text file
listing the scan and removal results; skim through these results to
confirm that the antivirus program successfully removed each item.
Malwarebytes may also prompt you to restart your PC in order to complete
the removal process, which you should do.
If your problems persist after you've run the quick scan and it has
found and removed unwanted files, consider running a full scan with
Malwarebytes and the other scanners mentioned earlier. If the malware
appears to be gone, run a full scan with your real-time antivirus
program to confirm that result.
Hacking - Firewalls And Networks How To Hack Into Remote Computers
Sniffing Passwords
Perhaps the most common loss of computer privacy is the loss of passwords. Typical users type
a password at least once a day. Data is often thought of as secure because access to it requires a
password. Users usually are very careful about guarding their password by not sharing it with
anyone and not writing it down anywhere.
Passwords are used not only to authenticate users for access to the files they keep in their
private accounts but other passwords are often employed within multilevel secure database
systems. When the user types any of these passwords, the system does not echo them to the
computer screen to ensure that no one will see them. After jealously guarding these passwords
and having the computer system reinforce the notion that they are private, a setup that sends
each character in a password across the network is extremely easy for any Ethernet sniffer to
see. End users do not realize just how easily these passwords can be found by someone using a
simple and common piece of software.
Sniffing Financial Account Numbers
Most users are uneasy about sending financial account numbers, such as credit card numbers
and checking account numbers, over the Internet. This apprehension may be partly because of
the carelessness most retailers display when tearing up or returning carbons of credit card
receipts. The privacy of each user’s credit card numbers is important. Although the Internet is
by no means bulletproof, the most likely location for the loss of privacy to occur is at the
endpoints of the transmission. Presumably, businesses making electronic transactions are as
fastidious about security as those that make paper transactions, so the highest risk probably
comes from the same local network in which the users are typing passwords.
However, much larger potential losses exist for businesses that conduct electronic funds
transfer or electronic document interchange over a computer network. These transactions
involve the transmission of account numbers that a sniffer could pick up; the thief could then
transfer funds into his or her own account or order goods paid for by a corporate account.
Most credit card fraud of this kind involves only a few thousand dollars per incident.
Sniffing Private Data
Loss of privacy is also common in e-mail transactions. Many e-mail messages have been
publicized without the permission of the sender or receiver. Remember the Iran-Contra affair
in which President Reagan’s secretary of defense, Caspar Weinberger, was convicted. A crucial
piece of evidence was backup tapes of PROFS e-mail on a National Security Agency computer.
The e-mail was not intercepted in transit, but in a typical networked system, it could have
been. It is not at all uncommon for e-mail to contain confidential business information or
personal information. Even routine memos can be embarrassing when they fall into the wrong
hands.
Want to know more? Click here...
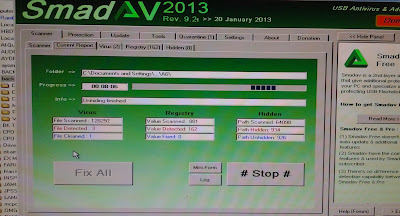
351/10/13 - Desktop e-Machine reformat windows 7
- Boot using mini XP
- Scan virus
- Repair hidden files yg disebabkan oleh virus.
- Backup files.
- Reformat Windows 7 Ultimate.
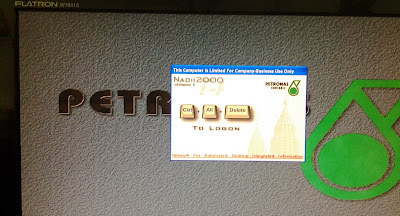
350/10/13 - Reformat HP Compaq DC7700 with XP
- PC yang telas dilupuskan oleh Petronas dijual kepada staf.
- Reformat semula untuk buang system yang digunakan. User biasa dah takpakai system tu.
- Setting driver boleh dipindah turun daripada internet.
- Kalau tak boleh donload daripada intenet, boleh contact kami untuk dapatkan CD driver tersebut.
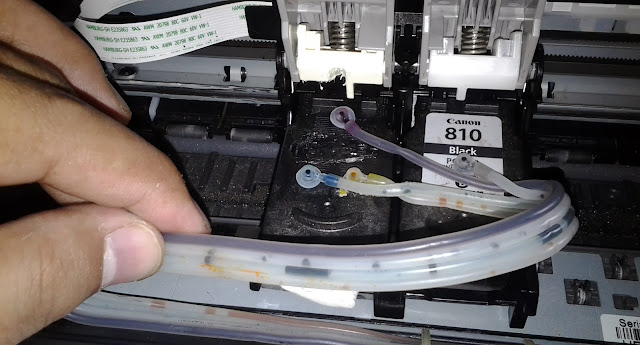
352/10/13 - CISS servis for printer Canon IP2770
- Pastikan sambungan tiub pada katrij tidak tersepit pada pin lock katrij.
- Pastikan tiub sambungan pada katrij tidak bocor.
- Jika berlaku kebocoran, udara akan masuk dalam tiub dan menyebabkan dakwat tidak dapay disedut daripada tangki.
iPad 2 upgrade...
Subscribe to:
Posts (Atom)


